 The fiberglass roof is only ONE PLY of fiberglass or about 1/8". It's layered and compounded at the weatherseal areas, but...
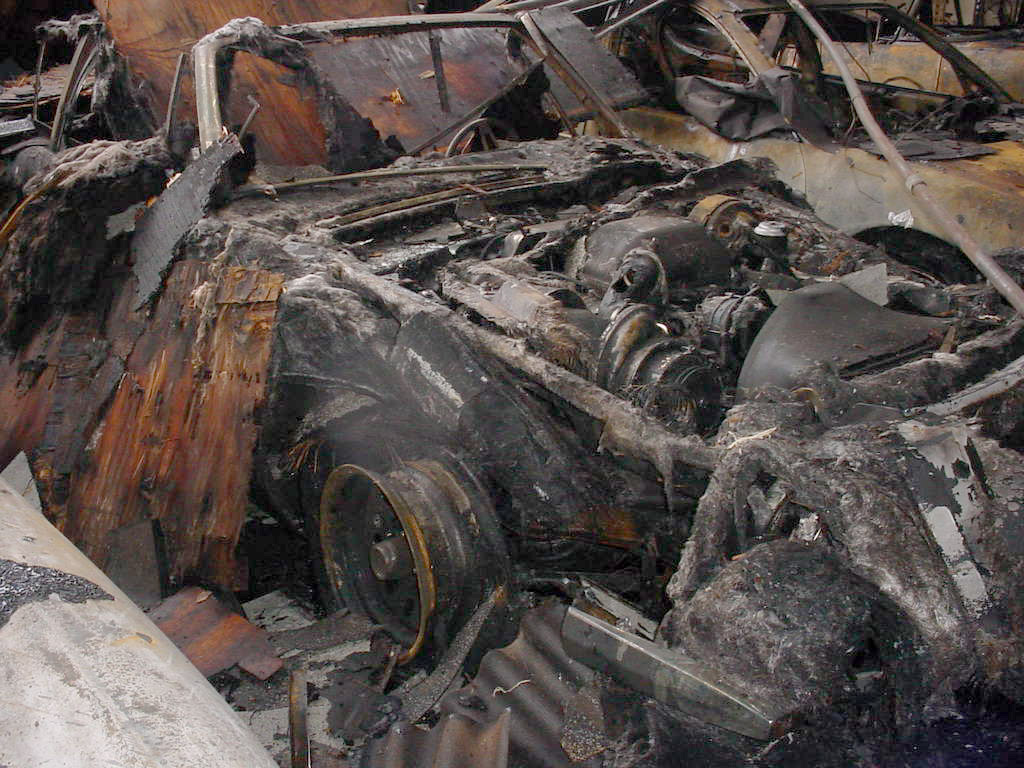 See this photo of a burned out Avanti, exposing the steel in the roof. The body itself with the doors, windows, etc, weighs about 800 Lbs. You could risk popping the windshield out or worse, screwing up the roofline. Granted, the more weight you remove, the less the effect, but ..... your choice
When I lifted the body off my car, this was the process and is actually a test of my memory, but it's pretty accurate and one man can do this.
I pulled my car into the garage ( 26'x28') and jockeyed it diagonally with floor jacks. Today they have those wheel dolly's that would be great but they raise the car a bit higher, initially.
Your buy list should include around 40 cinder blocks, two, eight foot, 4x4" or 6X6's and 3-4 twelve foot 2x12" at your local Hardware. Cut the 2x12's into 12" sections, stack them and the beams near the garage wall /
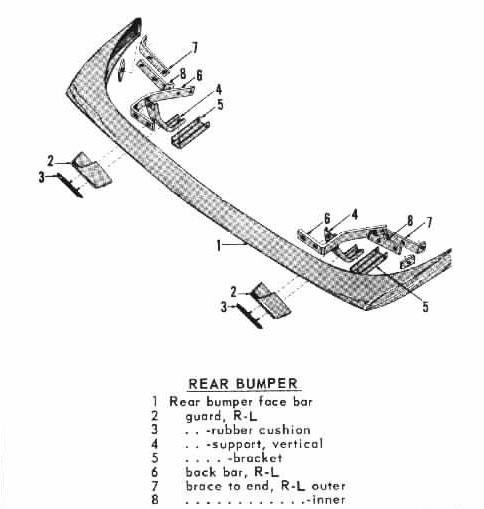
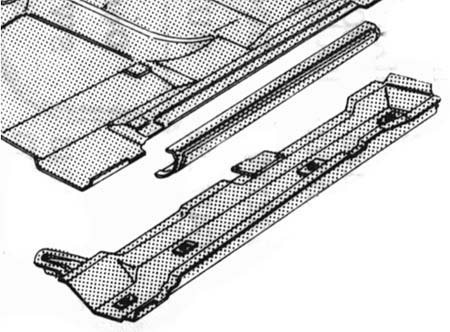
| Empty the gas tank & drain the radiator, remove the fuel line from the tank to the chassis and plug the tank fitting / Remove the rear shock absorbers, at least at the top / Remove the Brake line(s) from the master cylinder / Remove the battery ground strap / the oil pressure line at the firewall/ the electric harnesses that go through the firewall (the rear harness runs through the floor of the car, so only the front needs attention/ the steering at the rag joint / Remove the heater hoses and if necessary, disconnect the A/C hoses./ Disconnect the gas pedal linkage from the bellcrank at the rear of the drivers cylinder head / Lastly, remove the bumpers and carefully MARK and remove steel bumper brackets from the chassis / Here are the bumper diagrams.... / it is advisable that you use a couple heavy socks on the ends of the bumpers to prevent scratching the body. Then BEFORE removing the internal brackets, you clean them thoroughly and and spray paint the one side as they sit in the chassis , so the contrast defines their angles, make your side notations and disassemble them to remove them. You cannot remove the brackets in one piece. | |
 Front |
 rear rear
|
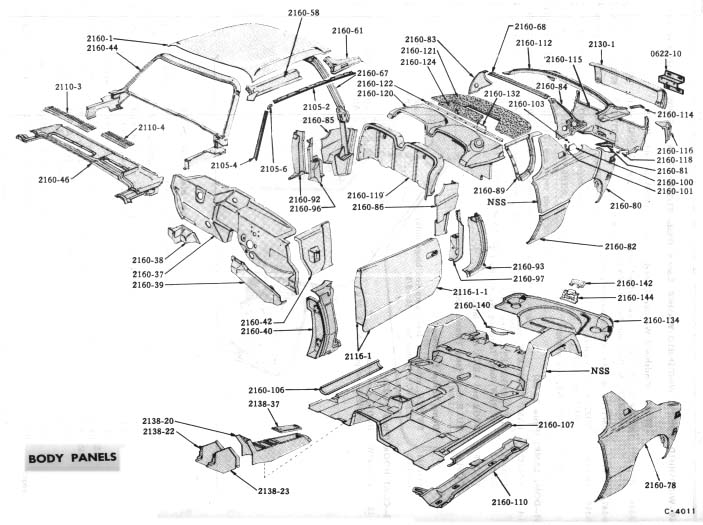
The body bolts are as follows... There are 2 bolts at the radiator core support, then the two at the firewall (accessible from inside the car on the forward floor, where there are 2 circular covers that expose the bolt) Remove the firewall bolts completely / then loosen two at the same plane in the TB's, 3-4 under the TB's on each side, then completely remove the 2 after the rear wheel arch inside the raised area attached to the bumper, but loosen and leave the one that bolts the trunk support to the spare tire well. Do not remove them entirely, except as stated. Use this as a reference.. Here are the TB's
At EACH body mount point, COUNT, NOTE and MARK the body spacers as once you start the body up, they'll fall out and things can get confusing. These shims are not all the same thickness and have to be reassembled as they were installed.
Before I began the lift, I started by making pylons of two concrete blocks outside the ends of the TB's a foot away from the car, then jacked the car up by the frame as high as it could go. The front by the center of the main crossmember, the rear by the differential (No safety stands this time) / Remember the body is now only attached by the bolts at 75% looseness /
Place a stack of 12x12" sections under a point about 6" from the end of of each TB, stacked up as high as they will go / You should have wheel arch, 6" of TB (No more) , then the stack of wood on each corner / Let the jacks down slowly until the TB's rest on the wooden stacks / At that point, going further will start to separate the chassis from the body / This is the point of no return / Have your body mount bags ready for those steel spacer shims. I cannot stress this enough, you cannot confuse their sequence or remounting the body will be a disaster.
Lowering the chassis further now, will start the separation, so go very slow / You expect to see the chassis moving away from the body and the heads of the remaining bolts that were at 75% looseness, should start disappearing upward. Continue slowly and monitor the bolt heads. Any that don't move, means you forgot to loosen something or something is stuck. The body mount shims have rubber isolators which may stick to the chassis or body and abruptly fall off mixing up the spacers, so be aware of the above paragraph/
Once you are SURE there's no interference in the descent, remove the remainder of the body bolts entirely. the chassis is on the ground and things are clear, The TB's are at least a foot off the floor / move the jacks to the ends of the TB's, put a large piece of cloth wrapped wood between the jack pad and metal TB and pump it up and inch or two / Slide a piece of 2x12 into the wooden stack on each side then repeat this continually, on the other corners until the body is high enough to slide a couple 8 foot, 4x4"s or 6X6" under the body and above the chassis. The beam ends are going to supported the front and rear of each TB and the beam ends will sit on the concrete blocks. When the beam is finally placed under the body, they will likely need need some height to support the body, so insert those wooden 2x12' pieces under them / Build up the wood shims under the beams until the body is supported by the beams on the concrete blocks and you can start to remove the wooden stacks between the floor and the TB's.
Once the body was supported by the wooden beams under the TB's, you can easily jack up the outer end of each beam and slide another 2x12" shim to the stack and slowly raise the body / Continue this rota and once the height of the wooden shims is greater than the height of a cinder block, then remove the wooden shims and replace them with another course of cinderblocks. Continue this rota until you have the body as high as you need.
I had mine high enough (4 feet+) to roll the chassis out and do the necessary work on it, replace the engine and transmission, etc. So nice to be able to work on the chassis by looking down at it..
The body at 4 feet or so was also great to work on, stripping the lower areas of paint and repairing any damage.