Bob's Studebaker Resource Website
Phil Brown, Land O' Lakes, FL
From SDC Forum #78271
I’ve been on a quest to make my 59 Silver Hawk as comfy to drive as my Lexus. The first step was to put in power door locks (with remote lock/unlock).
So, now on to power windows:
I initially thought of getting the real ones for a Hawk, but decided that would be costly and rare.
I then looked at the flat window kits that completely replace the window mechanism.
But what I finally decided on was a kit that drives the existing winder mechanisms. This allows everything to stay essentially stock, with only the removal of the winder handle.
The big hurdle was to be covering up the resultant hole and drive mechanism.
I’m almost finished with the driver’s door, so I thought I’d post my progress
I needed some other items, but we'll get to that soon.
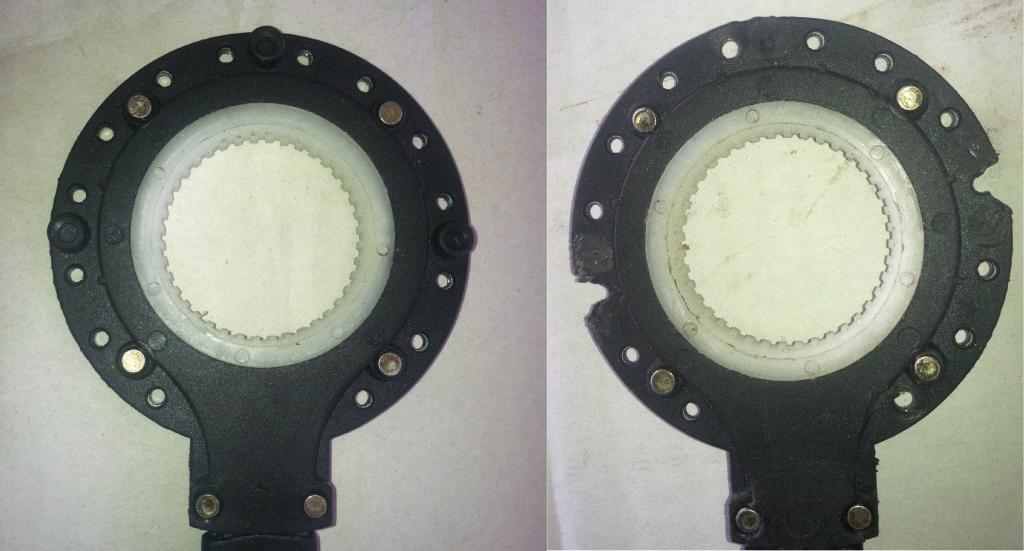
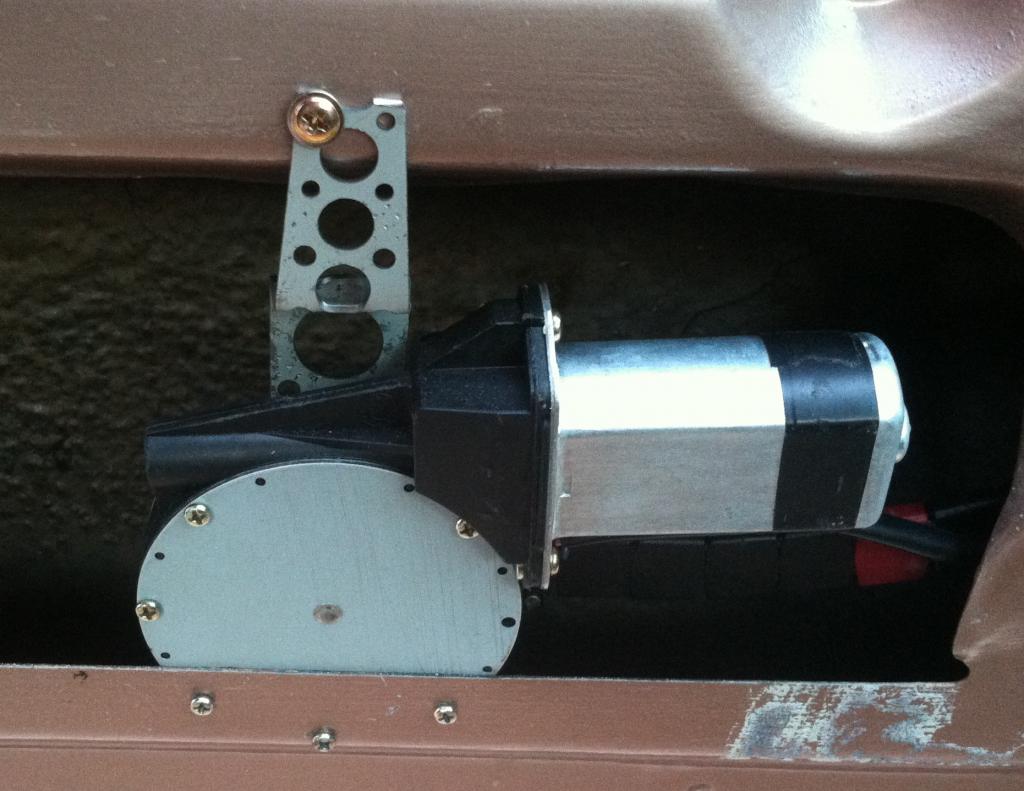
Here's the drive mechanism
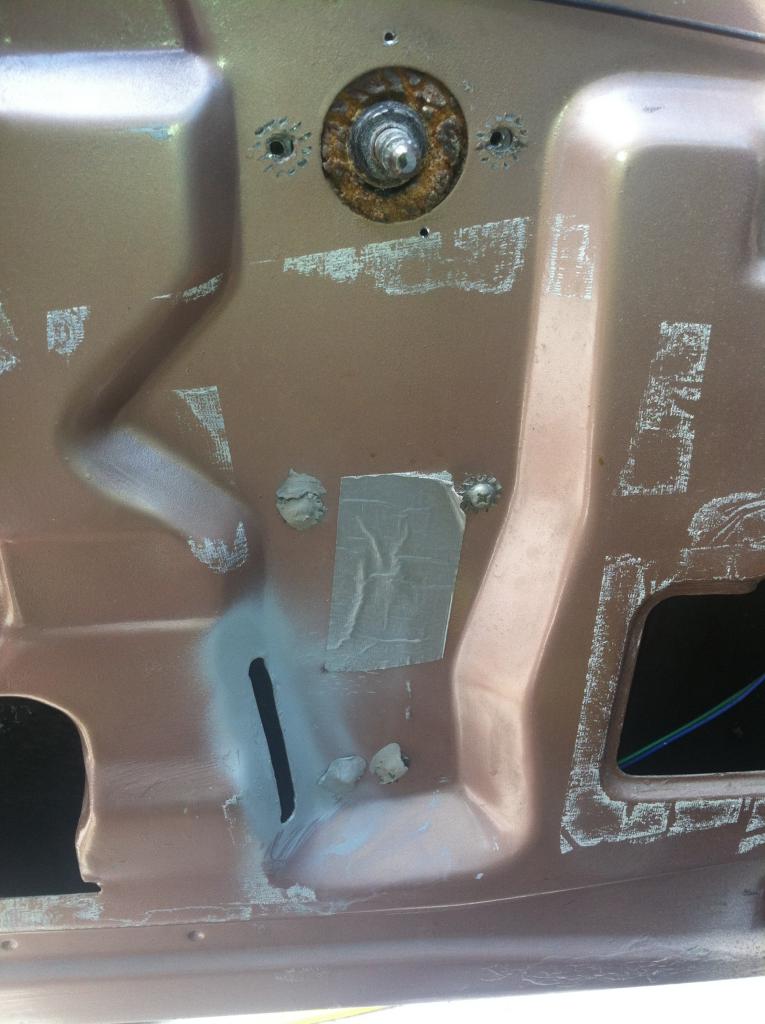
You can see the cut I had to make to pass the mechanism thru here
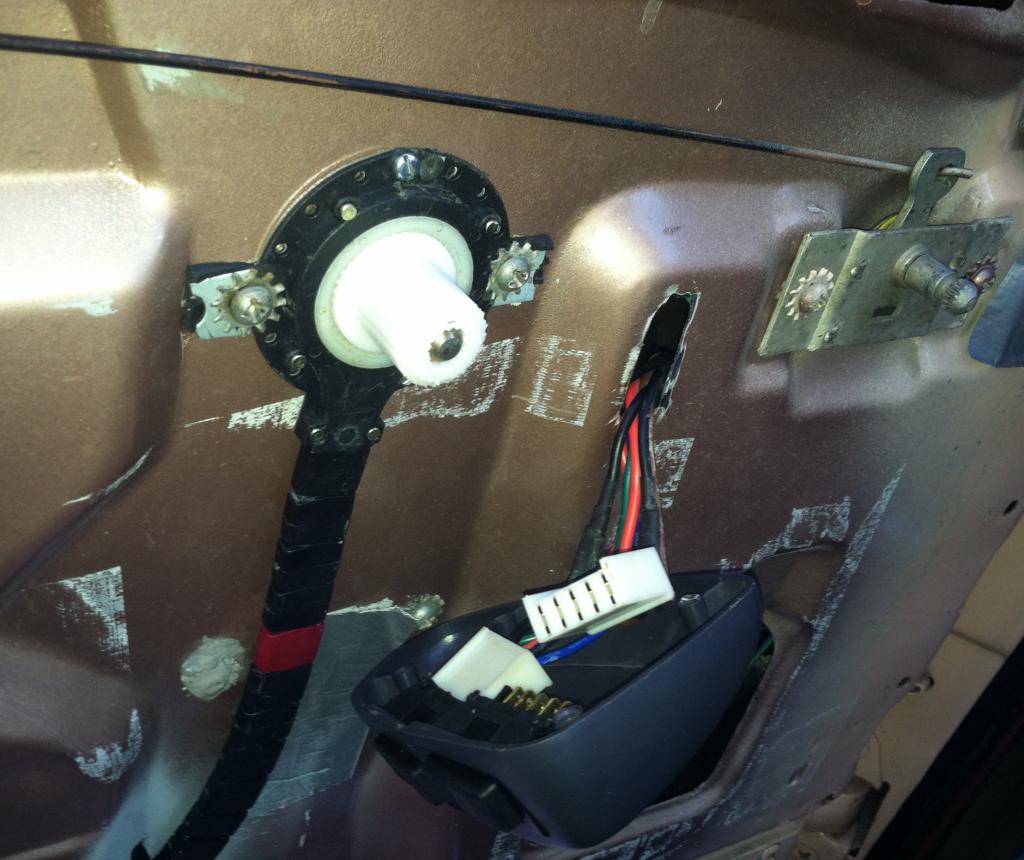
And here is the first pass on the install
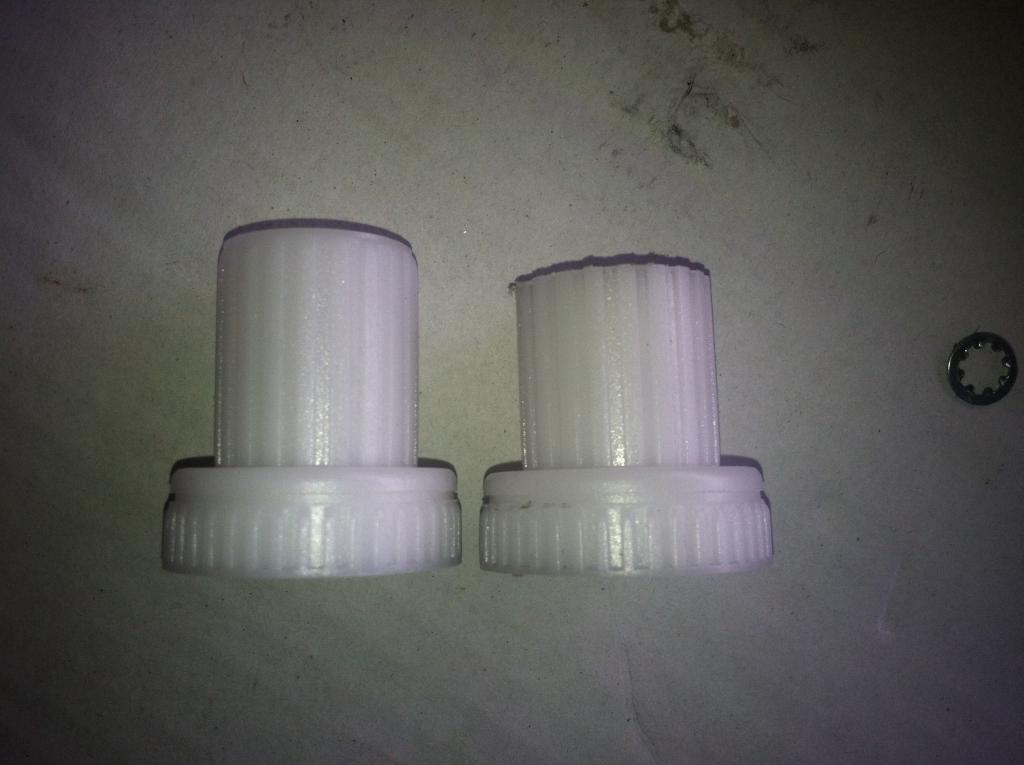
The sprocket fit inside the drive and then captures the crank splines. I ground it down a little so it wouldn't stick out as much:
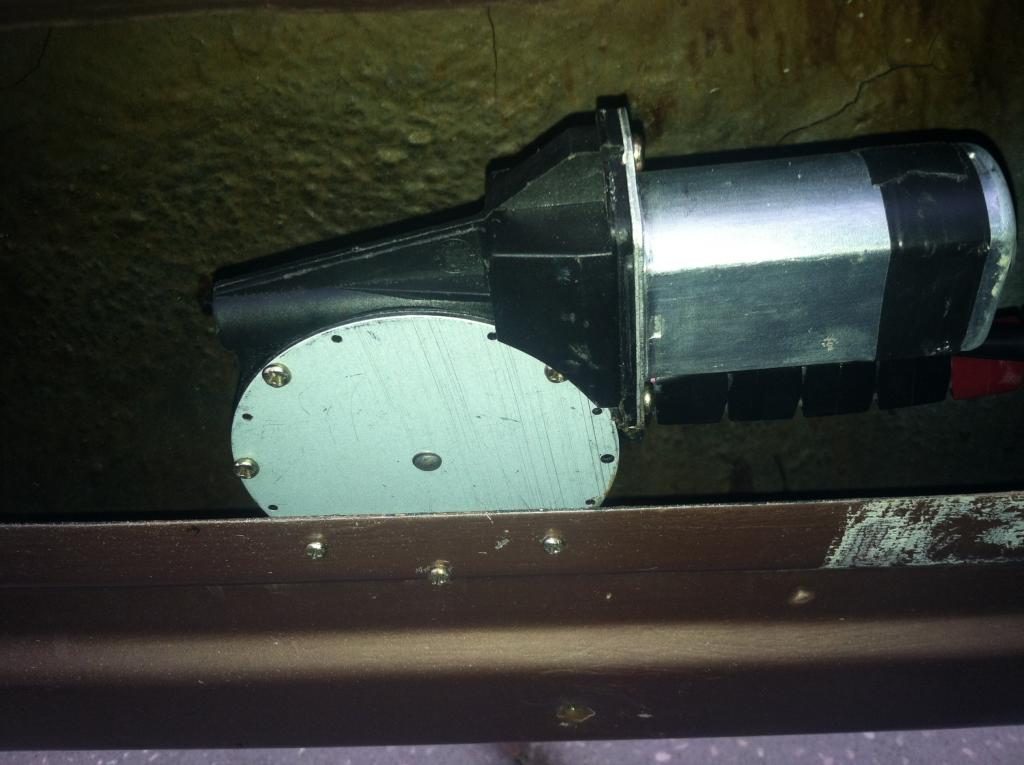
I removed 3 screws from the motor housing and re-installed them through the inner door sheet metal
I thought this would be enough, but the torque of the motor caused the sheet metal to flex so I put in an extra brace:
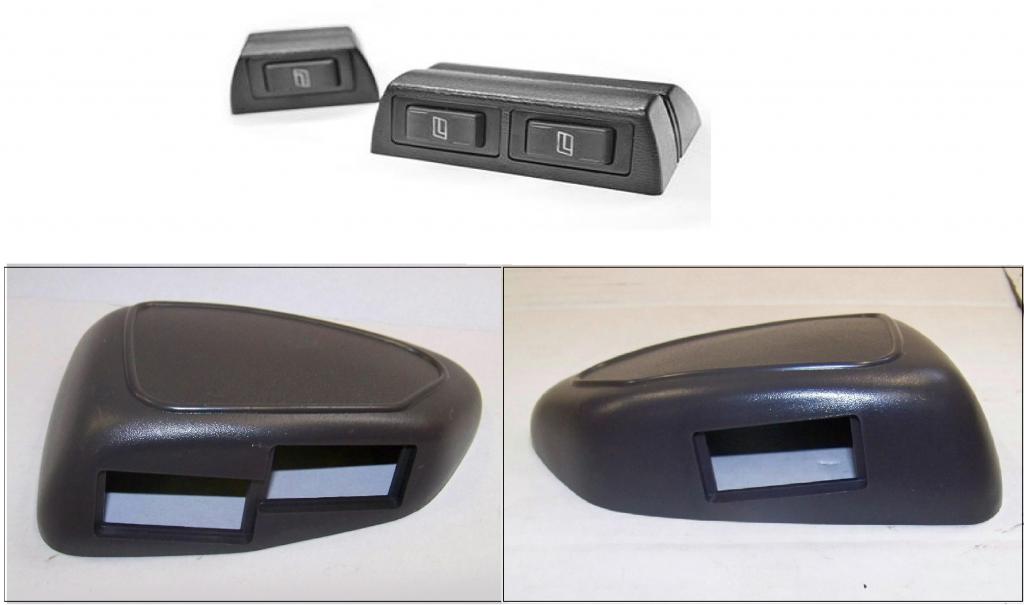
I found the bottom ones on ebay for $6 each. You can see that they are more 50's retro and have lots more room inside.
I had to put a hole up towards the top of the door that would pass the harness connectors, and then terminate inside these pods.
Today I plan to get some grommets to protect the wires from the cut edge, put a hole in my door card and upholstery for the wiring (the only step that fully commits me, as I can't go back after that! ) and button everything up.
January 2014
Power Windows in my Hawk
Here's the $70 kit I bought: https://www.ebay.com/itm/151177158112?ssPageName=STRK:MEWNX:IT&_trksid=p3984.m1439.l2649
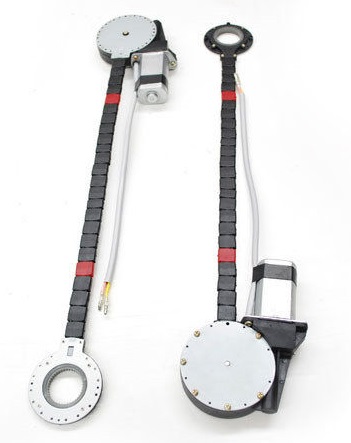
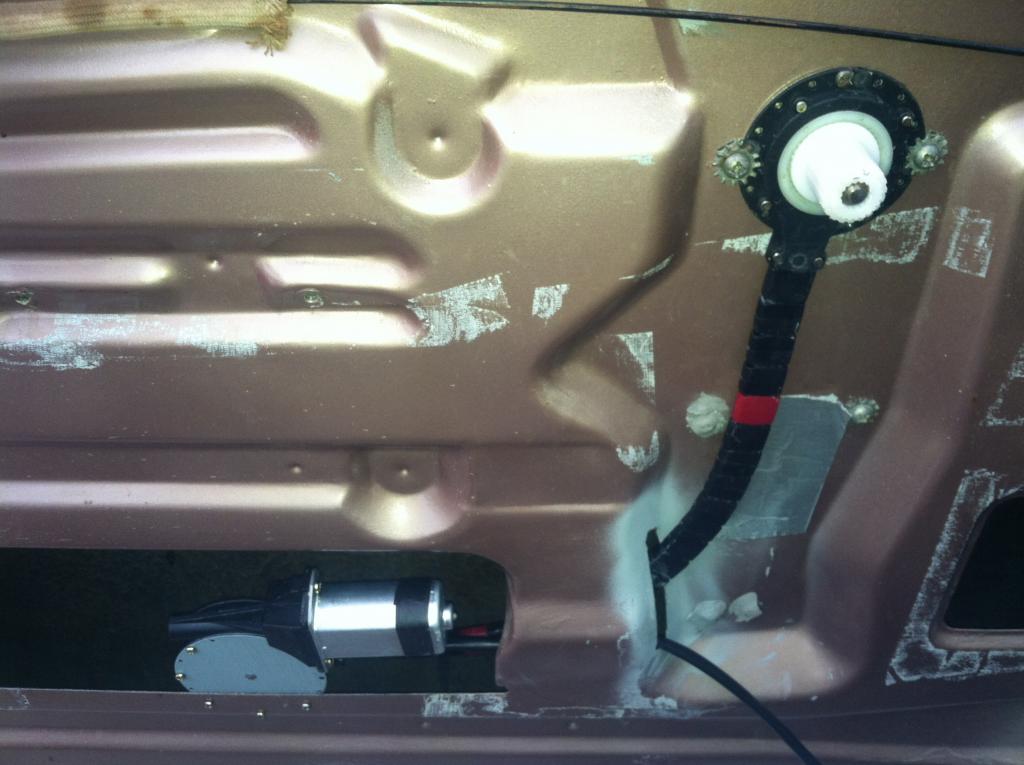
The drive mechanism is held in by the screws for the crank system (plus 2 smaller added screws for stability). I modified it so that it had notches to fit around the screws.
The switch pods that came with the kit (top in picture) were very modern looking and had almost no space inside to hide the crank spindle (Which is what I wanted for a neat install)