| Author |
 Topic Topic  |
|
|
Lark Parker
Cruiser Member

USA
235 Posts |
 Posted - 12/06/2007 : 1:34:38 PM Posted - 12/06/2007 : 1:34:38 PM


|
THIS IS JUST AN EDITED VERSION OF THE EARLIER #2 AND HAS BEEN DONE FOR EASIER READING. SORRY FOR THE FUMBLING AROUND UNTIL I GET THINGS FIGURED OUT ON HOW TO POST THE SERIES.----
Things said here are easy to be misinterpeted as "that is the only way it is done" "that is always the way it is done" "he is saying my way is no good" etc.
The pictures represent the way I do many things a lot of the time.
Some will be disappointed that the process is "low tech" or whatever. Much of what I do is original or an an adaptation of a process I have read about. Because of the originality, however simple the process, I want to pass on what took a fair amount of effort to gain. I am able to do cars in a quarter, or less, of the time that it took when I started. Then, my lack of skill was made up by longer work. There is no need for everyone to have to do that.
The "ironing" method is an adaptation of a process I read about in SKINNED KNUCKLES many years ago. That author's process used shaped dowels and a hammer. That worked unsatisfactory for me so I changed it.
Some of the tools may be a little over the top for a guy with just one car and that is realized, however, I am presenting what works for someone who would like to do things quicker and better. Many times it is faster to make the "special tool" than struggle through. People may just need to realize what tools are needed and they are obviously not that complex.
We will get around to hammering next week. In the meantime: DON'T USE A PUNCH TO REMOVE DENTS.
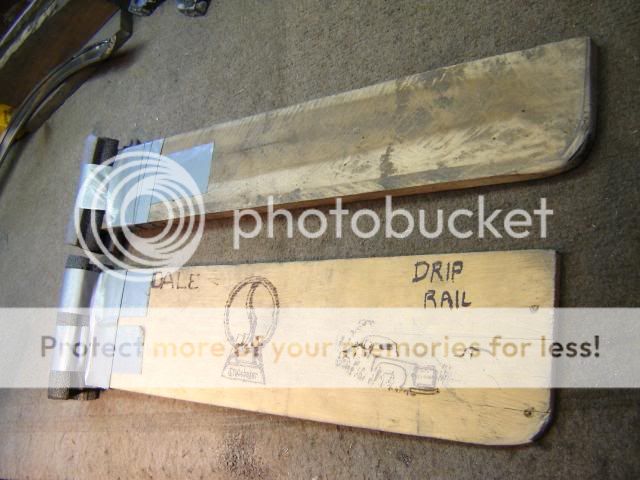
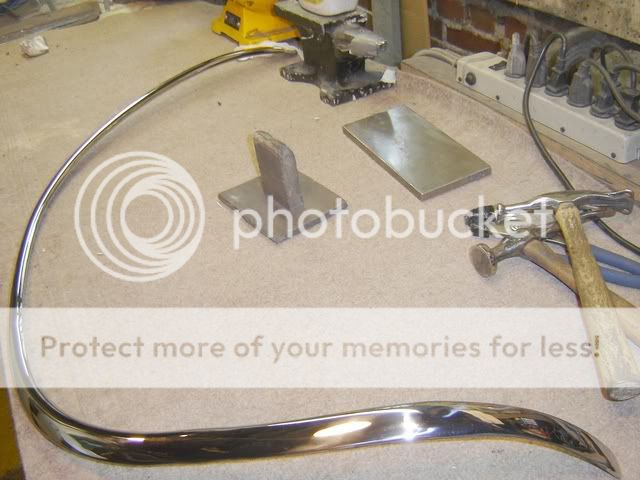
These are wooden pieces that are padded to fit under the armpit and the other end is rounded to push out areas such as a flattened spot on a wheel well trim. The piece is backed up with thin carpet runner or perhaps a padded board with a cleat to help hold the piece while force is put on it. Patent applied for<G>. These work better than "hammering" in some applications as they bring back the desired shape more evenly. The thinner one is for drip rail stainless and is made wide for better strength. Ignore the wood burning as they were used for practicing before being converted to something useful.
Length of these depends upon your height and height of workbench. Cut a board length that will allow good force for an "ironing" motion. The length is a fit to my height and the workbench height. The board width is determined by the piece to be worked on.
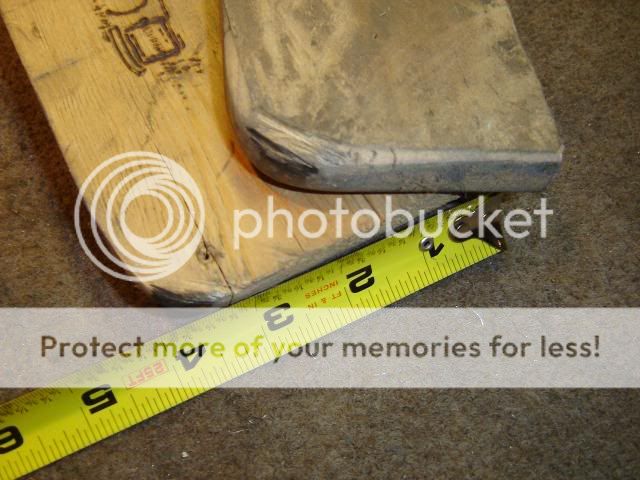
Just to give a rough idea of size., The width gives strength to the thin boards. The bottom one is 1/4" thick and the top board is 3/4" thick. This is common hard wood from crates. The nail hole isn't very important. I often use pipe foam insulative wrap held on by duct tape to pad the armpit end.
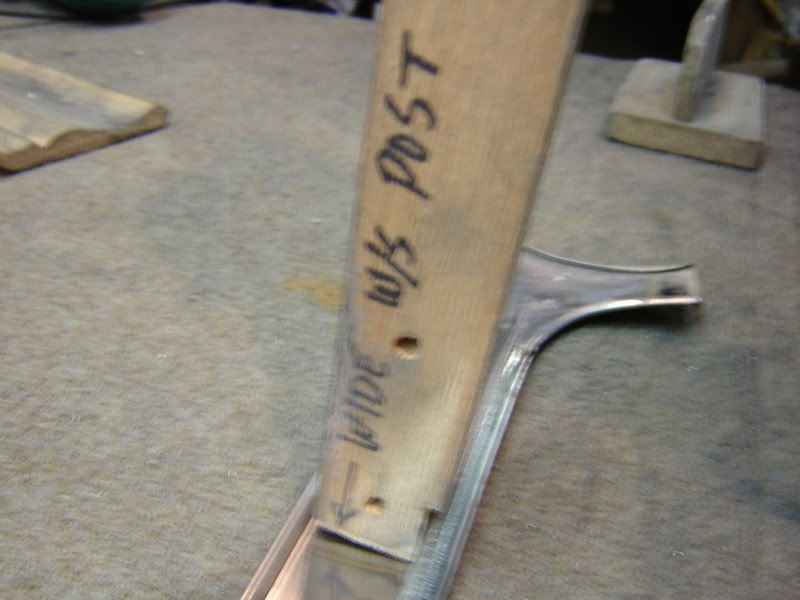
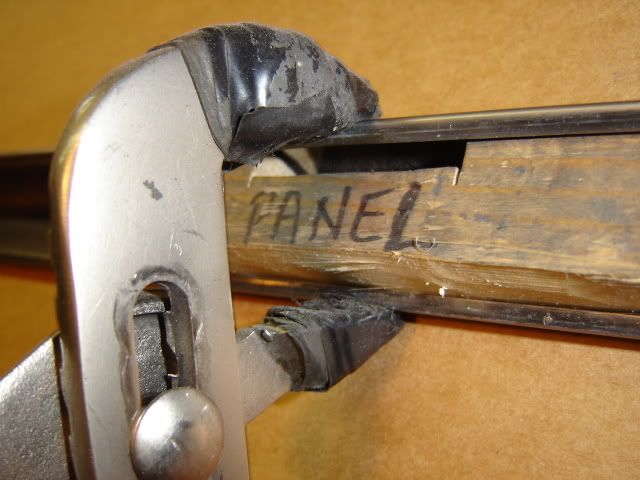
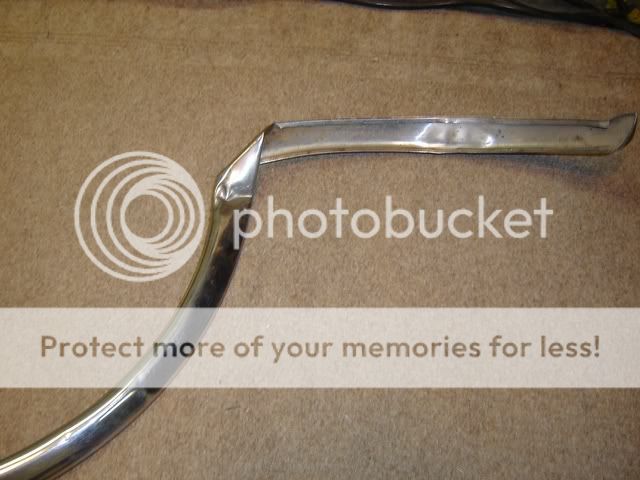
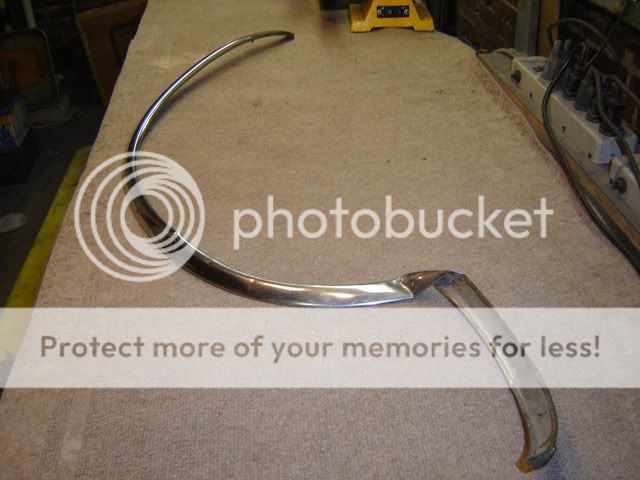
K body windshield side piece tool -- These relatively flat pieces bend easily and often suffer push-in damage when being reinstalled.
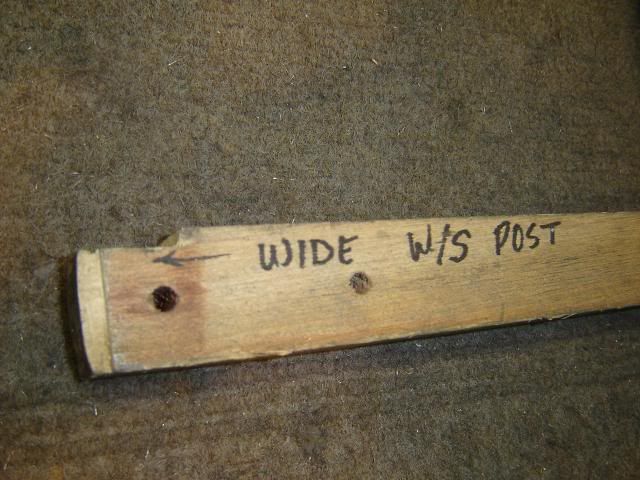
Shape the end to the ideal curve(s). This may be a template taken from several cars and averaged. Top and bottom shapes are a little different. The holes are for cooling when I work really fast.
Use a thin padding under the piece while ironing.
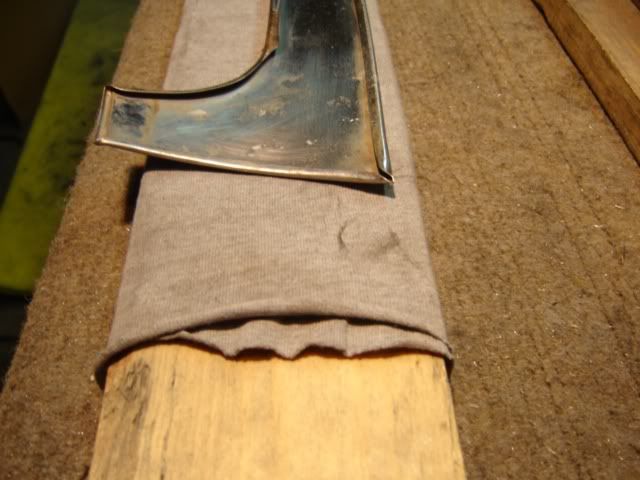
53-5 C/K Quarter panel strip. To remove clip marks from a 1953-5 C/K quarter panel top stainless strip.

The notch in the wooden block isolates the area to be worked on. I mark wood pieces as they will be saved and used again.
Squeeze gently. The plier jaws are padded with rubber tape under the vinyl tape. The jaw teeth have been smoothed to avoid damage. I add a couple of half-round notches to help hold the piece. Avoid sharp corners. Without the wooden block the sides just flex in and out again and this also avoids adding a pliers dent to the straight side. Finish straightening with the hammer and selected grit paper.
 Lark Parker Lark Parker
If at first you don't succeed --you'll get a lot of advice. |
Edited by - Lark Parker on 12/17/2007 3:16:11 PM |
|
|
doug
Starlight Member

USA
52 Posts |
Posted - 12/06/2007 : 2:27:54 PM
|
| I can't wait for the next installment. It looks like an intelligent approach to the subject. Could be metal work for the non-metal worker. |
 |
|
|
jbwhttail
Cruiser Member
USA
159 Posts |
Posted - 12/06/2007 : 4:10:36 PM
|
Dale, set up a photobucket account(it's free) and you can get photos here and text under each of them.
https://photobucket.com
It is an addiction! |
|
|
|
gordr
Commander Member

Canada
1074 Posts |
Posted - 12/06/2007 : 5:25:18 PM
|
Thank you, Dale, for taking the time to take and post these pictures.
I'm wondering if, for moldings with a complex profile, one couldn't line an undamaged section of the molding with felt or chamois leather, and then pack epoxy putty into the backside of the felt to form a soft-surfaced tool to work out dents elsewhere on the part?
Gord Richmond, within Weasel range of the Alberta Badlands |
|
|
|
Lark Parker
Cruiser Member
USA
235 Posts |
Posted - 12/06/2007 : 6:59:39 PM
|
quote:
Originally posted by gordr
Thank you, Dale, for taking the time to take and post these pictures.
I'm wondering if, for moldings with a complex profile, one couldn't line an undamaged section of the molding with felt or chamois leather, and then pack epoxy putty into the backside of the felt to form a soft-surfaced tool to work out dents elsewhere on the part?
Gord Richmond, within Weasel range of the Alberta Badlands
Most dents are "hammered OUT" from the back/inside of the piece. So I don't do that.
People regularly suggest casting a plug inside and pushing it along to push the dented surface out. That might(?) work but that hasn't appeared to be the fastest way and the areas pushed back into shape will still have to be tweaked in with the hammer.
Another problem with that is the clip retainer lips will also retain the plug on most pieces. By the time we do all that and get the plug in, and then back out, and repair any lip damage, we could have three pieces done (even with my bad hands).
Dents "out" rather than "in" sometimes result from the clips, or the doofus that removed the trim. But those are generally small and easy bumps to smooth "down" from the outside.
But on the other hand:
THe "door end" of the 1956-8 Hawks front fender trims get smashed flat from the door. They have such a troublesome (complex) profile I cast an JB Weld pattern (nail reinforced core) to make a reusable backing to help get the contours back. Since I did many Hawks that was well worth the effort and gave a faster, better result than I had been getting previously. A plug like that will work on either side and a Hawk owner could make his own if needed from the other good side. Because of that shape, polishing is still a problem so this is a place to use a small flapper with fine grit.(ie 1000 grit)
That piece does not have much clip lips at that spot so making and using that was a no-brainer.
So your idea has some merit depending on the piece. I didn't use any jacket on the pattern except for some Saran Wrap when I cast it.
Lark Parker
If at first you don't succeed --you'll get a lot of advice. |
Edited by - Lark Parker on 12/06/2007 7:11:23 PM |
|
|
|
clarkwd
Champion Member
USA
28 Posts |
Posted - 12/06/2007 : 7:57:54 PM
|
Mr. McPhearson
It was my honor to have met you a few years ago in South Bend when you were kind enough to spend a few minutes with me and give me a few pointers. Since then I have had the opportunity to spend a hundred hours or more undenting and shining the stainless for my Speedster and gain an appreciation for what you do. Thank you for posting these tips. Please keep them comming, we appreciate it. You're a treasure.
Thanks
Bill
PS, I know that a bow tie does help in the installation of a rear window. Have you found the jacket and pipe to help in this unbending business? |
|
|
|
Lark Parker
Cruiser Member
USA
235 Posts |
Posted - 12/06/2007 : 8:59:34 PM
|
quote:
Originally posted by clarkwd
Mr. McPhearson
It was my honor to have met you a few years ago in South Bend when you were kind enough to spend a few minutes with me and give me a few pointers. Since then I have had the opportunity to spend a hundred hours or more undenting and shining the stainless for my Speedster and gain an appreciation for what you do. Thank you for posting these tips. Please keep them comming, we appreciate it. You're a treasure.
Thanks
Bill
PS, I know that a bow tie does help in the installation of a rear window. Have you found the jacket and pipe to help in this unbending business?
If I tell you something different this time from what I told you a few years ago, then you must have been talking with my evil twin brother. He doesn't smoke a pipe and wear a jacket.
Like most people, you will get a lot of satisfaction from the stainless on your car as it does cover up the holes and trim clips that would be so otherwise unsightly.
Lark Parker
If at first you don't succeed -- you will get a lot of advice.
|
|
|
|
mbstude
Commander Member
USA
3237 Posts |
Posted - 12/07/2007 : 12:01:02 PM


|
Thanks for posting this, Mr. P. I for one really enjoy it, and truly admire the quality of the product you turn out. 
Thanks again for posting, keep it up. 
Matthew Burnette
'59 Scotsman
'63 Daytona
Hazlehurst, GA
 |
|
|
|
Scott
Commander Member
USA
1495 Posts |
Posted - 12/07/2007 : 8:43:20 PM
|
Well, I must admit I was impressed with your ingenuity for making unusual wooden shapes. Since I couldn't see more than a sliver of metal in any picture I saw (was that done on purpose?), I'll have to imagine how wonderful those trim pieces must be. |
|
|
|
Karl
Regal Member

USA
340 Posts |
Posted - 12/07/2007 : 9:28:50 PM
|
| Thanks for posting this thread and pictures. Gives me some ideas to repair my rear window trim. |
|
|
|
Lark Parker
Cruiser Member
USA
235 Posts |
Posted - 12/08/2007 : 11:46:56 AM
|
quote:
Originally posted by Scott
Well, I must admit I was impressed with your ingenuity for making unusual wooden shapes. Since I couldn't see more than a sliver of metal in any picture I saw (was that done on purpose?), I'll have to imagine how wonderful those trim pieces must be.
I have thought about your disappointment and have decided to take a humble wiseass approach to answering.
Since I only have two hands, using one for the camera, one for holding the stainless strip, one for the hammer, and one for scratching my backside, there won't be many "hands-applying-tools-to-stainless-pieces-pictures". You can also see why I advise against using a punch as that would require one more hand.
There are plenty of websites that can be searched (stainless restoration, auto trim, stainless trim, etc) that show hands working on trim pieces.
But --- there is some things advised there that I don't follow.
Postwar Studebaker stainless is about .022" thick.
Their polishing advice starts with a file and 80 grit sandpaper.
Think about that.
I see very little point in repeating information others have already offered. I do keep those links as there is always some little idea that might be worthwhile. Email me and I will hook you up with a couple of better ones, but that doesn't mean I agree with all they say or advise buying the almost useless supplies they hawk.
The 53-55 quarter panel strips clip-damage is one of the largest(?) aggravating problems in Studebaker stainless kingdom.
I did a lot of them the hard way until lightning struck my feeble brain and the stupidly simple notched wooden blocks were tried. Without the patented block, the trim side just flexes and springs back when the high tech pliers are removed.
Do a few dozen strips without the pliers and block and get back to me.
The windshield pieces are also a commonly damage piece and were used on C/K for 11 years. The shaped wooden piece helps. Ditto the armpit boards on some general pieces.
Your mileage and success will depend on your straightening habits.
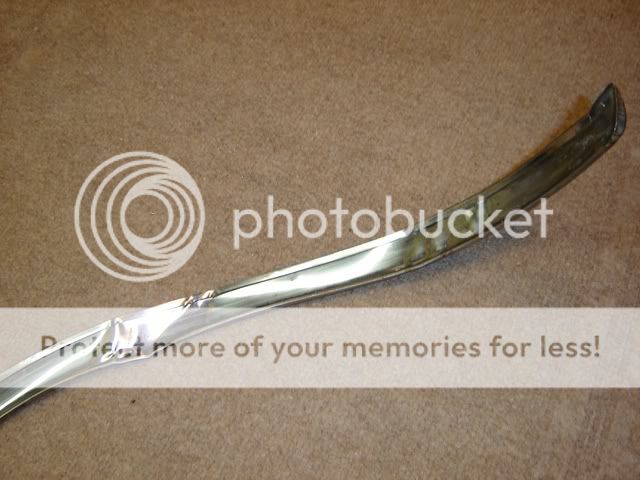
For pictures of completed stainless pieces, here's a picture of a pretty good Packard hawk wheelwell trim that I scuffed up, dented and put a 90degree bend in.
Lark Parker
If at first you don't succeed -- you will get a lot of advice.
|
Edited by - Lark Parker on 12/08/2007 12:07:14 PM |
|
|
|
Lark Parker
Cruiser Member
USA
235 Posts |
Posted - 12/08/2007 : 12:04:46 PM
|
quote:
Originally posted by Karl
Thanks for posting this thread and pictures. Gives me some ideas to repair my rear window trim.
Hang on Karl. We'll get to those.
Lark Parker
If at first you don't succeed -- you will get a lot of advice.
|
|
|
|
Scott
Commander Member
USA
1495 Posts |
Posted - 12/08/2007 : 12:19:38 PM
|
| I am impressed now. Thanks for the pictures. |
|
|
|
Kdancy
Golden Hawk Member

533 Posts |
Posted - 12/10/2007 : 09:46:05 AM
|
| Impressive! Love to have some hands on training on your methods. |
|
|
| |
Topic |
|