| Author |
 Topic Topic  |
|
|
BubbaBear
Cruiser Member

USA
122 Posts |
 Posted - 12/17/2009 : 10:11:02 PM Posted - 12/17/2009 : 10:11:02 PM


|
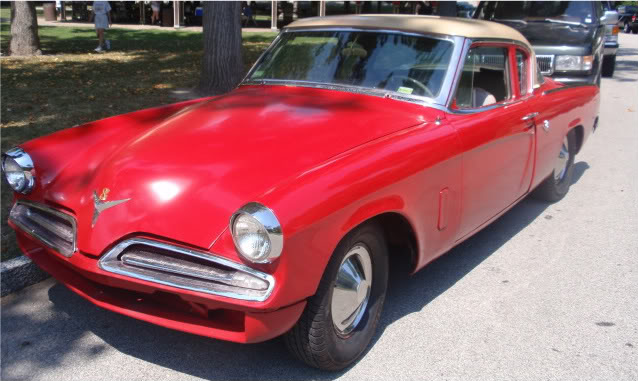
’53
Starlight Coupe – 224 In drive it takes off in low. When it goes to
shift theres a LOUD scary thump, a little vibration in the
transmission, then it catches and is fine. Thoughts? Suggestions?
|
|
|
rockne10
Commander Member

USA
4509 Posts |
Posted - 12/17/2009 : 10:36:39 PM
|
First thought is to service the trans. Drain it all out including the torque converter and clean or replace the filter screen.
Refill
with Dexron/Mercon. If that solves the issue you've gone the cheapest
route. If not, you've spent little and harmed nothing.
DG200 trans with selector in "D" should start in second gear. Shift should feel firm and quick but not frightening.
Someone put a 1955 engine in your '53? |
 |
|
|
BubbaBear
Cruiser Member
USA
122 Posts |
Posted - 12/17/2009 : 10:48:43 PM
|
|
Thanks, no did I read something wrong. This car is all original. Sat in
a garage over 35 years, only 50XXX on it and I have all the info on the
original owner. It was placed in storage after it was bought from her. |
|
|
|
rockne10
Commander Member
USA
4509 Posts |
Posted - 12/17/2009 : 10:58:50 PM
|
1953 V-8 would be a 232 cid.
The
DG200 is a very strong transmission. I would not be surprised if a
fluid flush cures your ills. Also, the vibration could be transmission
mount.
Brad Johnson
Pine Grove Mills, Pa.
 '33 Rockne 10, '51 Commander Starlight, '53 Commander Starlight "Désirée" '33 Rockne 10, '51 Commander Starlight, '53 Commander Starlight "Désirée" |
Edited by - rockne10 on 12/17/2009 11:00:20 PM |
|
|
|
buddymander
Commander Member
2095 Posts |
Posted - 12/17/2009 : 11:49:48 PM
|
|
If it really is taking off in first gear, then the only thing that is
happening when it goes to second is the application of the second gear
band. I wonder if the band has gotten out of adjustment over the years.
A sloppy adjustment is worse than no adjustment at all. If a band is
way loose it can break upon application. That one might adjust from
outside the case, but not sure. |
|
|
|
Mr.Biggs
Commander Member
USA
12671 Posts |
Posted - 12/18/2009 : 12:59:44 PM
|
1st gear start was not incorporated into Stude's DG transes until 1954
- and then only in the Champion line. It wasn't until 1955 and the
introduction of the DG-250 that V8 cars started out in 1st.
Lotsa years since '53. Lotsa things forgotten along the way. Look at
the tag on the rear of the tranny. See what DG model it says it is.
1957 Transtar 1/2ton
1963 Cruiser
1960 Larkvertible V8
1958 Provincial wagon
1953 Commander coupe
1957 President two door
|
Edited by - Mr.Biggs on 12/18/2009 1:00:04 PM |
|
|
|
53k
Commander Member
USA
2194 Posts |
Posted - 12/18/2009 : 3:00:32 PM
|
quote:
Originally posted by BubbaBear
’53
Starlight Coupe – 224 In drive it takes off in low. When it goes to
shift theres a LOUD scary thump, a little vibration in the
transmission, then it catches and is fine. Thoughts? Suggestions?
Your
tranny, if original, starts in second. When it shifts to high it also
locks up the torque convertor at the same time. Depending on throttle
position, that can be a pretty rough shift, especially if you are
comparing it to a modern car.
Paul Johnson, Wild and
Wonderful West Virginia. '64 Daytona Wagonaire, '64 Daytona
convertible, '53 Commander Starliner, Museum R-4 engine, '62 Gravely
Model L, '72 Gravely Model 430
    |
|
|
|
studegary
Commander Member
USA
6322 Posts |
Posted - 12/18/2009 : 3:46:29 PM
|
As others said, change the fluid in the transmission AND torque converter. Make sure the refill level is checked PROPERLY.
Gary L.
Wappinger, NY
SDC member since 1968
Studebaker enthusiast much longer |
|
|
|
BubbaBear
Cruiser Member
USA
122 Posts |
Posted - 12/18/2009 : 10:23:10 PM
|
I probably used the wrong terminology because I am unfamiliar with
Stude transmissions. When I said low I meant the gear before Drive.
Can
someone give me the complete instructions on changing the fluid
including the torque converter. I had it once but can't find it. Thanks. |
|
|
|
buddymander
Commander Member
2095 Posts |
Posted - 12/19/2009 : 1:29:30 PM
|
|
Aren't you going to first make sure the fluid level is correct before
anything else? Just from a troubleshooting standpoint; always do the
easy simple stuff first. |
|
|
|
studegary
Commander Member
USA
6322 Posts |
Posted - 12/19/2009 : 2:00:29 PM
|
quote:
Originally posted by BubbaBear
I
probably used the wrong terminology because I am unfamiliar with Stude
transmissions. When I said low I meant the gear before Drive.
Can
someone give me the complete instructions on changing the fluid
including the torque converter. I had it once but can't find it. Thanks.
Please use the SEARCH function on this Forum. I type/input too slow to put it all up hare once again.
Gary L.
Wappinger, NY
SDC member since 1968
Studebaker enthusiast much longer |
|
|
|
55s
Golden Hawk Member

Canada
640 Posts |
Posted - 12/19/2009 : 4:41:00 PM
|
I own and have driven several 1955s.
Yes, they do tend to "bump" when they lock up, especially with Ford transmission oil. Some people prefer this.
Dexron will smooth out the bump.
Weak point - parking pawl. Be careful when taking the car out of park on a hill, or you will break the pawl.
Paul |
|
|
|
55studeman
Cruiser Member
USA
187 Posts |
Posted - 02/02/2010 : 6:10:13 PM
|
Hello BubbaBear, Thought I would chime in and compile a few things for new DG tranny owners.
Instructions on changing the oil:
1) Warm up the tranny by driving a few miles if possible
2)
Drain the pan by one of two methods: A)by removing the oil pan drain
plug B) For more thorough draining remove the drain pan and clean out
heavy sediment that collects and clean the wire mesh filter at the same
time.
*Next up is to Drain the Torque converter
3)Remove the cover plate on the bottom of the T/C housing
4)Put tranny in Neutral,
5)Rotate T/C until you see the drain plug
*I like to rotate the T/C with a big screw driver wedged between the T/C to flex plate bolts
6)Remove T/C drain plug and let fluid empty
7)Replace the T/C drain plug, firm tightness
8)Replace the T/C cover plate
9)Replace the oil pan drain plug
10)Now read and follow the instructions below, copied from another post I did.
FILLING THE DG TRANNY
Use
DexIII -merc or better, as the new technology ATF's are very good and
there's no bad issues with using this new stuff with old auto-trannys
(because modern trannys are increadibly similar on the insides to our
old 50's trannys, when you look at the basics of clutch packs,
bushings, the stuff that matters when it comes to oil.)
9 liters
is the max (+/- a little)-this ONLY applies if tranny AND torque
converter totally empty. If during a rebuild, your TC is prefilled with
a quart or two when you re-install the tranny (highly recommended),
then how much you will need to add will be lower -please be aware of
that. If you end up putting in 10, I'd be worried as that is definitely
above what the shop manual specifies and it's above the amounts that I
have ever seen put in.
With completely empty tranny and T/C, here's fill up procedures:
1. MAKE SURE PARKING BRAKE IS FIRMLY ENGAGED!!!
2. Add 6-7 liters prior to startup.
3.
Start engine, immediately put tranny into Drive or Low (either works
perfect, idea here is to 1) fill brake band actuators, 2) apply low
gear brake band to decrease splatter that gets on dipstick making it
hard to impossible to read it)
4. Add an additional quart within first 30 seconds with car running.
5. Check dipstick for level (engine still running)
6. Add additional oil as needed (engine still running)
7. Repeat steps 4-5 until level is just below full.
8. Move gear selector through positions.
9. Now Drive car around block -double check to see if level has changed.
10.
Continue driving 10-20 minutes) until engine/tranny at HOT operating
temp, then make final oil level check. If overfilled, suck some out, if
under-filled top it off.
OTHER NEED TO KNOW INFORMATION FOR NEW DG TRANNY OWNERS
**OCCASIONAL
BRAKE BAND ADJUSTMENT IS CRUCIAL -follow procedure below (copied from
another post I did -easier that way) Modern cars do this automatically,
our 50's cars don't. If you do lots of stop and go driving, where more
shifts occur, expect to do this more often, for most it's probably a
once every 15,000 -30,000 check.
This is all covered in the shop manual, I'd highly recommend anyone working on the DG to get one, if you don't have it already:
There
are three bands, the most forward band is the reverse, the middle is
low and the rear is the forward band. All of them are adjusted the
same, with a lock nut and an adjustment screw. The low and forward
bands are reached via the driver side and the reverse is reached from
the passenger side. The idea is to loosen the lock nut and then adjust
the band until it is close but not binding on the planetary gear drum.
Studebaker specifies a special "band adjustment tool" which is a rare,
very rare, item. I have one that I got off ebay, so I made up some
instruction to do it without it based on counting the turns of the
screw. So far those who have done it, say it works very well -I also
did this method for a number of years prior to getting the tool.
So here it is, the shade tree way of doing it,
Stude DG series (150, 200, or 250) brake band adjustment:
Loosen
the lock nut (3/4 socket) and tighten the adjusting bolt (5/16 open end
socket) until it bottoms out tight against the drum. Next mark the
square adjusting bolt so that you can count turns, I did it with "white
out" on one edge. Then you want to back off the bolt a certain amount
of turns. The exact amount according to the special adjusting tool came
out to be 2.5 turns (-this would be the minimum). Prior to getting the
tool I did it manually like this and I now remember that I did 3 full
turns, which meant it was a little loose but it still worked -only
problem with too loose is it will need adjustment more often. There you
have it 2.5 to 3 turns. This adjustment is the same for each band, Low,
Forward, and Reverse. With it at the correct adjustment, hold the screw
with one hand while you tighten the lock nut to roughly 28 ft-lbs -or
simply snugged tight.
Well, I hope that helps you and many
others. If I failed to outline a procedure properly, my apologies in
advance -let me know and I will correct them.
Best Regards,
Eric West
"The Speedster Kid"
Sunny Northern California
Where the roads don't freeze over and the heat doesn't kill you.
And an open road is yours to have -only during non-commute rush hours 9am-4pm and 7pm to 7am (Ha, ha, ha)
55 Speedster "Lemon/Lime" (Beautiful)
55 President State Sedan (Rusty original, but runs great and reliable) |
Edited by - 55studeman on 02/02/2010 11:36:57 PM |
|
|
|
dynolou2
Cruiser Member
USA
128 Posts |
Posted - 02/03/2010 : 12:24:28 AM
|
Another way to adjust the bands, tighten the band adjusting screw on
the front band [its for reverse] to 45 inch/pounds and backoff 4 turns.
Tighten the center and rear bands to 45 inch/pounds and backoff 3
turns. Then tighten locknuts to 25 to 28 FOOT/pounds. This info came
from Trans. Digest article "Band Adjustments on the Oldies" . Lou Cote  |
|
|
|
dynolou2
Cruiser Member
USA
128 Posts |
Posted - 02/03/2010 : 12:32:25 AM
|
|
Just another thought, your car should have a 2 piece driveshaft. Is the
center support for the driveshaft in good condition? If you grab the
driveshaft on either side of it, it should not move up or down more
than a 1/8 of an inch. Lou Cote |
|
|
| |
Topic |
|
