
Bob's Resource Website (2007)
(Avanti Hog Troughs / torque boxes)
|
Hog Troughs - What they are & Preventative maintenance
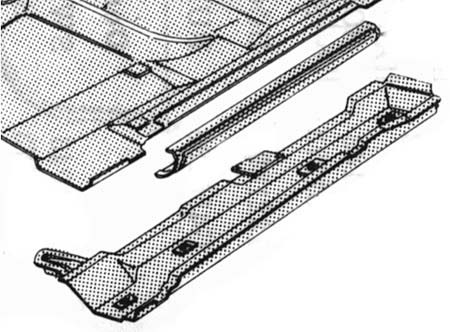
Here's a factory illustration
|
Here are new factory pieces
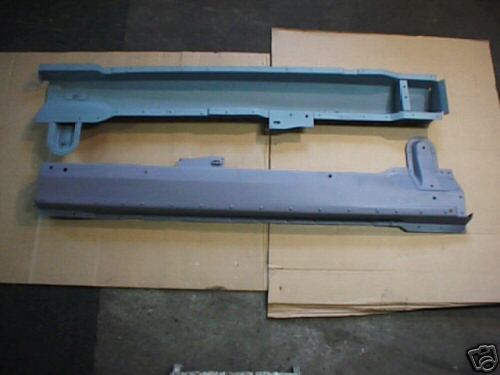 |
| AOAI Repair Article Page 1 Page 2 |
|
Replacement parts can be purchased from various vendors and come in multiple piece, single piece, regular and stainless steel. There were even fibreglas units available at one time.
Never having to do the job myself, I can only report that, over the years
of looking at these, if you did any kind of maintenance on your car, you'd
have noticed trouble early enough to halt it. In the event you wind up
with a car with rusted troughs, a quick evaluation of what's left structurally
would determine your course of action.
If you can see rust holes, then you can bet there is a lot more damage that
you can't see. A general test is to use the heel of your hand to check for
any serious deflection which would indicate a weakened sidewall. At that
point, I'd take a punch and try poking holes in the inner side panels to
see what's been compromised. Since moisture naturally lies on the bottom of
the channel, it would follow that the bottom is gone and starting up the
sides. It would be possible to undo the body bolts on one side and lift the
body slightly to replace the lower portion of the trough, using pieces of
your own formed steel or parts from a vendor. This would apply if there was
sufficient purchase to weld to, etc. If you're restoring an original
Studebaker with bad troughs, then the only way to go would be to completly
replace them, for authenticity value. Of course, you can patch them and
hide it with undercoat....
An entire single piece replacement entails cutting away portions of the front fender Where the windshield pillar attaches) and a piece of the rear also ( where the roll bar attaches) . Multiple piece repair sections can be welded to the existing channel much easier.
Another area to check is the FRAME section in the rear wheelwell, where it starts the upsweep over the axle. If this section of frame has rust on the underplate, closely check the attachment point of the rear part of the trough, especially the rear leaf spring attachment point. Frame rust exhibits itself by a bulge between the lower plate and upper channel. The bulge is caused by rust expanding the plates. Areas of rust like this can be repaired by cutting away the bad lower plate and replacing it with small sections, either welded or bolted. The leaf spring perches are riveted on, but can also be bolted on replacement. The perches themselves usually do not rust, but the section underneath does. I've never seen a frame, which was rusted through on the side of the upper channel. If this is encountered, only a professional opinion would be acceptable as to the repair possibilities.
Preventative Maintenance- Various methods have been used to coat the inside of the metal to prevent rust.
As stated, the vents terminate in the troughs. The troughs are supposed to have drain holes on the underside. If there aren't any, then drill some, using a 3/8" bit. One suggestion is to plug the drains, remove the interior vent grilles and pour old engine oil into the troughs. Take a drive on a curvy road to slosh it around and then return and drain to oil.
Personally, I've sprayed light oil into mine using a garden sprayer and keep
most of the holes capped with plastic plugs.
You can use a garden sprayer to coat the inside with phosphoric acid, which will destroy rust and leave a impervious coating. It would be best to do the oil coat afterwards anyway.
Not to steal any thunder from Ernie, read the below, regarding access holes cut in from above, under the carpets. An excellent idea and who would know. Even if they did, so what. it works...
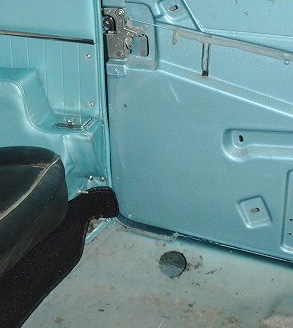
I was disturbed to find a layer of heavy rust on both sides and part of the area where the roll bar connects rusted away on one side. I scraped the loose stuff off as best I could and vacuumed the debris out. I then poured Eastwood's Corroless paint in, It's their version of POR 15 ( of which I am also a big fan). I jacked the car up front and then rear and then side to side to coat as much as possible and then used cheap foam brushes stuck in the end of some 3/8 gas hose to slather it around even more. After the paint dried, I sprayed in Eastwood rustproofing until it dripped out from the drain holes. The holes will be covered soon with a stick on soundproofing material I got from JC Whitney. My car will not see much wet weather and is in a garage so I'm hoping the deterioration has been halted. But I can't emphasize strongly enough that from the outside the hog troughs looked and felt as solid as new. The area to cut the hole in is below the sill plates a couple of inches from the edge of the rocker panel. It's pretty easy to determine where to cut. I don't think you would have to remove the front seats but it would make it easier to get the carpet to stay out of the way. Cut the rear hole as far back as possible so you can get good access to the area where the roll bar comes in. The section behind the roll bar can't easily be accessed from the top. I sprayed rustproofing in through the drain hole in the bottom of the trough. The rustproofing tool I have has tips that spray like a lawn sprinkler without the rotation so you can stick it up in a hole and spray the sides. By the way the Eastwood rustproofing gun is relatively cheap and doesn't need a big compressor. It's worth the investment for the job I described and if you have any metal cars it's a bargain. erizzolo@gateway.net Ernie Aug 01
Hope this helps and good luck.
rgds, Ron Maracle '63R1498
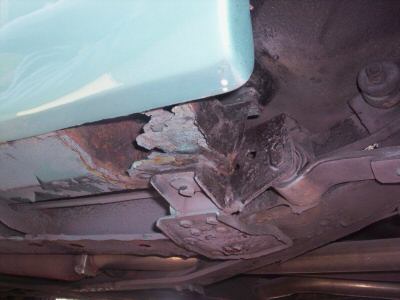 Here'a bad one!